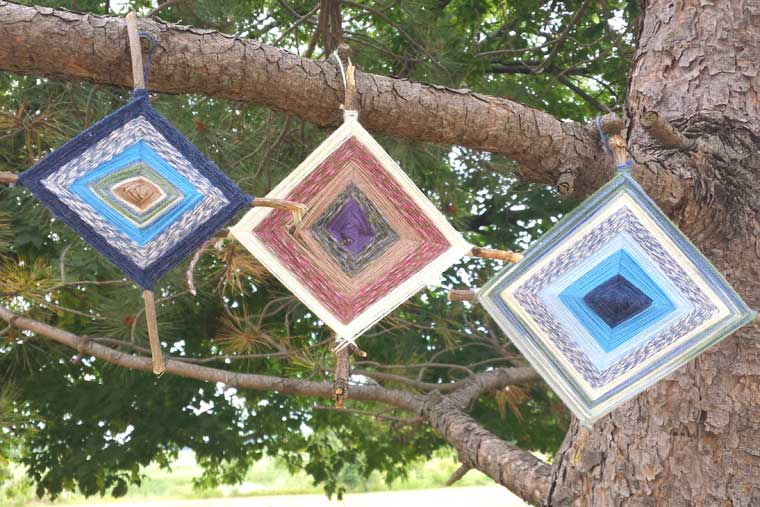
It’s HOT this week! That means little ones are spending more time inside keeping cool. If you need an art project to keep them busy and engaged on a summer afternoon, look no further! These Twig Tapestries are super easy to make, require very little supplies and are gorgeous once their finished! Display them by hanging them from trees, on your fence, or even on a wall. If you’d like to, you can even make several smaller ones and make a mobile for your child’s room. So, let’s get started!
To make your Twig Tapestry you will need:
- Yarn, string, ribbon etc. of your choice. Be creative! Use any string-like scraps you have laying around the house. Experiment with texture, colour, sparkle – whatever you’d like!
- Twigs, popsicle sticks, dowel, barbeque skewers – anything that is stick-like. Any size will do, just make sure you can make sets of two that are the same size and width.
- Scissors
Step One:
We used twigs we found lying around in the yard. We paired them off into sets that were the same length and roughly the same width.
Step Two:
Lay your twigs side by side and locate the center. Tie your selected yarn around the twigs to fasten them together, but not too tight! Rotate your twigs so they form an “X” shape. This will serve as the framework for your tapestry.
Step Three:
Then, lash them together. This is done by taking the rope and winding it around the points in your “X” shape where the arms meet. Think of it as winding a smaller “X” around the bigger one.
Step 4:
Now the fun part starts. Take your length of yarn and wind it around one of the arms of the “X”. Make sure you go over the arm, then behind, then over. Here, we’ll show you.
Step 5:
Once you have wound your yarn around one of the arms, carry the yarn over to the next arm, moving in a clockwise motion. Then, repeat Step 4, winding the yarn over, behind and over. Once you’ve gone around a few times, it will look like the pictures above.
Step 6:
Keep going! You’ll wind your yarn in the same way all the way around your “X” until you have the desired width of that particular yarn.
Step 7:
If you’d like to switch yarns, like we did, simply cut the yarn leaving about 4 cms loose. Then, tie a knot with the yarn around one of the arms of the “X”. Then, tie on a new length of yarn and keep winding. You can tuck in any loose ends as you go, or wait until the end and snip them.
Step 8:
Once you’re finished with your Tapestry, reserve about 6-8 cms of yarn to tie a loop at the end of the arm you wish to be the top of your tapestry.
That’s it! You’re done! Aren’t they beautiful?
Remember, you can experiment with this art project and even put some learning into it. Ask your kids to identify colour families. (For example, we did a tapestry that was all shades of blue). You can even ask them to pick a theme, like a rainbow.
If you make your own Twig Tapestry, we’d LOVE to see it! Post a picture and tag us on Facebook or Twitter.
www.facebook.com/TodaysFamilyEarlyLearningAndChildCare
@TodaysFamilyOnt
Happy weaving and stay cool!
Until next time,
Today’s Family


